Dear Eric: I have three lovely cast-iron pans in fairly regular use. I left one pan soaking by mistake and I now have a “rusty” pan. I cannot remember how to season it. Can you help, please? I know you are an advocate for these pans.
Pamela Sansom
Dear Pamela: You’re correct when you say I’m an advocate for cast iron pans. My affection for them came through my grandmother, who used her very large one to cook just about everything, from eggs to fresh-caught pike to giant hamburger steaks.
When I learned to cook those foods myself, it didn’t take long to figure out why she was so fond of that pan.
They are thick and heavy and able to heat evenly and hold a steady cooking temperature. If you drop them, they are not going to dent. Because of that sturdy construction, they’ll last generations, which in turn makes them very good value for the price.
In my always-growing collection of cast-iron pans, I’ve had some for 20 years or more and some of those were used when purchased. All are in good shape and ready to pass on to my son when that time comes, if I continue to treat them right, that is.
Pouring molten iron into moulds is how cast-iron cookware is made. During the process, microscopic air bubbles rise to the surface, causing tiny little holes to form once the iron is set. If not properly seasoned (sealed), moisture getting in those holes can cause the pan to rust, not an appealing vessel to cook with.
Some companies sell their pans pre-seasoned; other manufacturers require you to do the work. In the latter case, what I do when first buying a cast iron pan is to preheat the oven to 350 F. I wash the pan well and thoroughly dry. I then lightly wipe the pan all over, including the handle, with a thin coating of vegetable oil. Don’t overdo it; too much oil can result in a sticky finish.
Once oiled, place the pan in the oven for one hour, turn the oven off, let it cool there and then take it out. I then apply another thin coating of oil and it’s ready to use.
After each use, I quickly wash the pan in hot, soapy water. Do not let it soak too long and never use a very abrasive, powdered cleaner or scrubber, as doing that can “un-season” the pan. I then dry the pan well, often in the oven or on the stovetop if still warm. Early on in the life of the pan, I’ll also then wipe it with another thin coating of oil before storing it in a dry place until needed again.
If seasoned properly, as the pan ages it will turn black and form a resilient coating that prevents sticking and stops rust from forming. I’ve found that, if you frequently use the pan and wash and dry it properly, you’ll no longer have to keep moistening it with oil before storing it away.
However, as Pamela discovered, from time to time it may require re-seasoning. If you do have a cast-iron pan that has gone rusty, or see one at a garage sale in that shape, most often it can be revived with a little work.
Moisten the pan with water, sprinkle with scouring powder and scrub away the rust with a metal scrubbing pad. (It’s OK to use scouring powder at this time because you’ll be re-seasoning the pan). Wash the pan well, thoroughly dry and then season the pan as described above.
The techniques I’ve described have worked for me, but you will find slightly varying advice on how to season cast iron from source to source. These include using melted solid vegetable shortening instead of oil, and placing the cookware upside down in the oven to prevent the fat from pooling. If you try the latter, be sure to line the bottom of the oven with aluminum foil to catch any drips.
Skillet Baked Beans
This tasty baked-bean dish is easy to make because it uses already-cooked canned beans as the base (see Note). It can be made vegetarian by using beer or vegetable stock in the mixture of ingredients used to flavour the beans.
Preparation time: 10 minutes
Cooking time: About 55 to 65 minutes
Makes: 4 servings
2 tsp vegetable oil
1/2 medium onion, diced
1 garlic cloves, minced
1/2 cup beer or chicken or vegetable stock
1/2 cup barbecue sauce
1/3 cup ketchup
3 Tbsp cooking molasses
1 Tbsp Dijon mustard
1 Tbsp balsamic vinegar
* A few splashes Worcestershire and Tabasco sauce
2 (14 oz.) cans white beans, drained well, gently rinsed with cold water, and drained well again (see Note)
1 green onion, thinly sliced (optional)
Preheat the oven to 375 F. Place the oil in a 10-inch cast iron skillet and set over medium heat. Add the onion and garlic and cook 4 to 5 minutes. Add the stock, barbecue sauce, ketchup, molasses, mustard, vinegar, Worcestershire and Tabasco and whisk to combine. Mix in the beans. (The pan will be quite full, but will only gently bubble when cooking and should not spill over.)
Remove from the heat and cover skillet with foil. Set the skillet in the oven and bake beans 50 to 60 minutes, or until gently bubbling and piping hot. Sprinkle beans with green onions and serve.
Note: The white canned beans I used in this recipe were Eden Organic great northern beans. They are available in the canned bean and legume aisle of most supermarkets. If you can’t find them, any other type of canned white bean should work in this recipe.
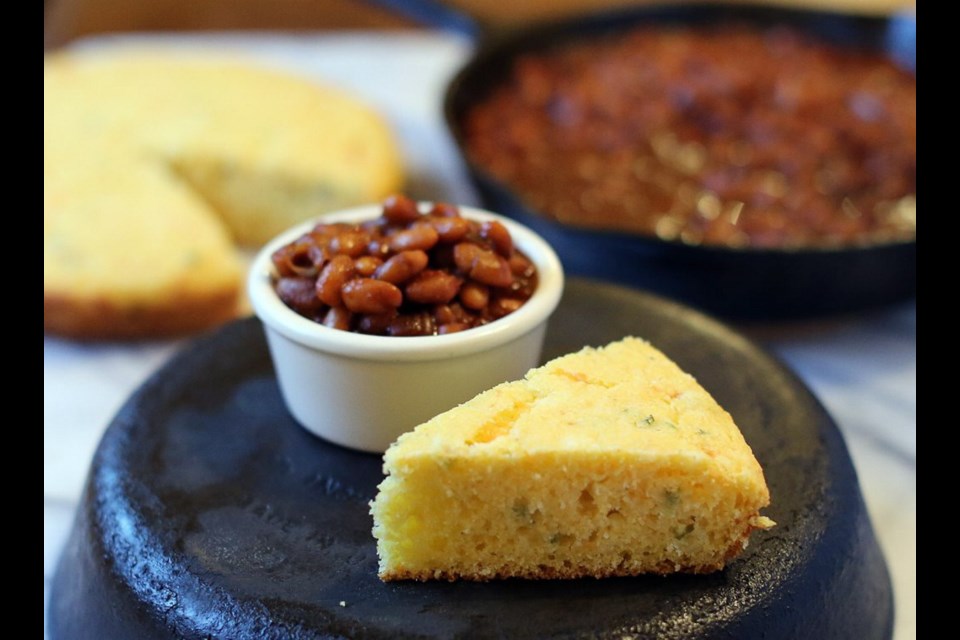
Cheesy Skillet Cornbread
This cheese and green onion strewn cornbread is great to serve with baked beans.
Preparation time: 15 minutes
Cooking time: 30 minutes
Makes: 8 to 10 wedges of cornbread
1 cup cornmeal
1 cup all purpose flour
1/4 cup granulated sugar
1 Tbsp baking powder
1/4 tsp salt
1/2 cup grated cheddar cheese
2 green onions, thinly sliced
1 1/4 cups buttermilk
3 Tbsp vegetable oil
1 large egg, beaten
1 Tbsp vegetable oil
Preheat the oven to 375 F. Place the first five ingredients in a medium bowl and whisk to combine. Stir in the cheese and green onions.
Combine the buttermilk, 3 Tbsp oil and egg in a second bowl. Add the wet ingredients to the dry and mix until just combined.
Pour one Tbsp oil in a 10-inch cast-iron skillet and swirl to evenly coat the bottom of the pan. Set the pan over medium heat. When hot, spoon and spread the batter into the pan. Lift the skillet off the stovetop and set in the middle of the oven. Bake for 30 minutes, or until the cornbread springs back when touched in the centre.
Set the skillet on a baking rack and cool 10 minutes. Now invert the cornbread onto a cutting board. Serve the cornbread, warm or at room temperature, cut into wedges.
Eric Akis is the author of the recently published hardcover book Everyone Can Cook Everything. His columns appear in the Life section Wednesday and Sunday. His Sunday column focuses on providing solutions to readers’ kitchen conundrums. You can send your culinary questions to Eric by email, or write to: Ask Eric, Times Colonist, 2621 Douglas Street, Victoria, B.C., V8T 4M2.