If you opened a neighbourhood bakery and included “butter” in its name, it would certainly attract attention. It’s an indication that what’s being prepared is — and had better be — the real deal, not wannabe-quality baked goods made with cheap substitutes.
On Sept. 4, 2007, Rosie Daykin opened such a bakery in Vancouver called Butter Baked Goods, known as Butter, for short. As she hurriedly prepared to open the doors that first day, she noticed she had already caused a stir.
“There was a lineup down the block of eager schoolchildren and their parents, old people, young people and everyone between. The look on my face was somewhere between panic and elation,” writes Daykin, in the introduction to her new hardcover book.
In Butter Baked Goods: Nostalgic Recipes from a Little Neighborhood Bakery (Appetite by Random House, $35), Daykin shares recipes and techniques for what she sells in her bakery, which now has two Vancouver locations.
On her website, butterbakedgoods.com, Daykin says she sells the yummy, made-from-scratch, fine-ingredient baked goods you remember from your childhood.
“We take the greatest care to make sure that everything at Butter tastes as good as Mom would have made,” Daykin says.
It’s natural that Daykin would acknowledge moms as being the source of sweet things. Her mom’s willingness to let her muck around in the kitchen, beginning at age six, kindled a dream to one day open her own bakery.
“I grew up in a busy household. There were four kids, lots of pets and a constant flow of friends and family. I was the third child and my mom, as you can well imagine, was bloody exhausted,” Daykin said. “She gave me the freedom to bake. I learn best by getting in there and trying to figure it out. Everyone was always happy to eat up my baked goods [which] was inspiration to keep baking.”
She kept baking into adulthood, continued to love it, but did not make it a career at first.
“I started working and met my husband, married [24 years ago] and we had a daughter. I had by this time become an interior designer and that really took off,” Daykin said. “I was very busy for many years building that career, but I knew somewhere down the line my bakery was waiting for me.”
When she finally did make that career shift, she was aware of the ups and downs and hard work involved in running a food business, but didn’t dwell on them.
“Of course [I knew them], but it’s best to be a little naive about these things, because if we all knew the reality of the amount of work it is, it might prevent us from giving it a try. That’s what taking a risk is all about,” Daykin said.
Lovers of scrumptious baked goods, desserts and confections are glad she took that risk. Beyond her businesses, the result of all that work is also a truly marvellous book.
In Butter Baked Goods’ 268 pages you’ll find more than 100 recipes accompanied by beautiful photographs by Janis Nicolay.
Those recipes are divided into nine chapters that cover topics such as muffins, cookies, bars and slices and cakes.
When skimming through the recipes I wanted to try them all, such as peanut butter and jelly cupcakes, chocolate espresso pound cake, pumpkin chocolate chip blondies and Butter’s famous marshmallows.
Before you get to those recipe-rich chapters, the book provides a thorough and concise section on ingredients, equipment, techniques and getting ready to bake. This useful information will make a novice feel more confident, but Daykin says there’s only one way to become a better baker.
“Practise, practise, practise. Don’t be afraid to make mistakes. We learn our best lessons from our mistakes,” Daykin says.
With her new book, though, you shouldn’t have too many messes in your kitchen because her style of baking is geared toward sweet success.
“The whole idea behind the kind of baking we do at the bakery and the recipes in my book is that it is approachable, achievable and simply delicious,” Daykin said. “Life is already complicated — our baked goods shouldn’t be.”
Eric Akis is the author of the hardcover book Everyone Can Cook Everything. His columns appear in the Life section Wednesday and Sunday.
Recipes
Butterscotch Crispy Bar
This recipe is from Butter Baked Goods: Nostalgic Recipes from a Little Neighborhood Bakery (Appetite by Random House, $35).
Author Rosie Daykin says this bar is a fun take on the traditional Rice Krispies Treat. They set up nice and firm, which makes them great travellers. Perfect for kids’ lunches or as a little something to stash in the bottom of your bag.
And what could be better than rooting around in your handbag, searching for your car keys, only to discover a Butterscotch Crispy Bar?
Makes: 32 bars
8 cups Rice Krispies
1 cup dark brown sugar
1 cup dark corn syrup
1 cup plus 1 Tbsp butter
2 1/4 cups butterscotch chips
1 cup dark chocolate chips
You will need:
- (9x9-inch) pan buttered and lined with parchment paper
- small piping bag fitted with a small round tip (optional)
1. Place the Rice Krispies in a large mixing bowl and set aside.
2. In a medium saucepan over medium-high heat, combine the sugar, corn syrup and 1 cup of the butter. Bring to a boil and then remove the pan from the heat. Add 2 cups of butter- scotch chips and stir until completely melted.
3. Pour the butterscotch mixture over the Rice Krispies and mix well. Press the cereal mixture into the prepared pan firmly and evenly. Set aside.
4. In a double boiler, or in a heatproof bowl set over a saucepan of simmering water, melt the dark chocolate chips and remaining one tablespoon of butter. Pour over the cereal base and spread evenly with the back of a spoon or a small offset spatula.
5. In a double boiler, or in a heatproof bowl set over a saucepan of simmering water, melt the remaining 1/4 cup of butterscotch chips.
Use a small spoon or the small piping bag to drizzle the melted butterscotch chips back and forth over the chocolate layer.
6. Chill in the refrigerator for 1 hour or until the chocolate has set.
7. Run a small knife along the two edges of the pan that do not have parchment handles. Carefully remove the slab from the pan and cut into 1x2-inch bars. Make sure to use at least a 10-inch knife to avoid cutting and dragging the knife across the bars.
Note: These bars will keep in an airtight container for at least a week, or in the freezer for up to three months.
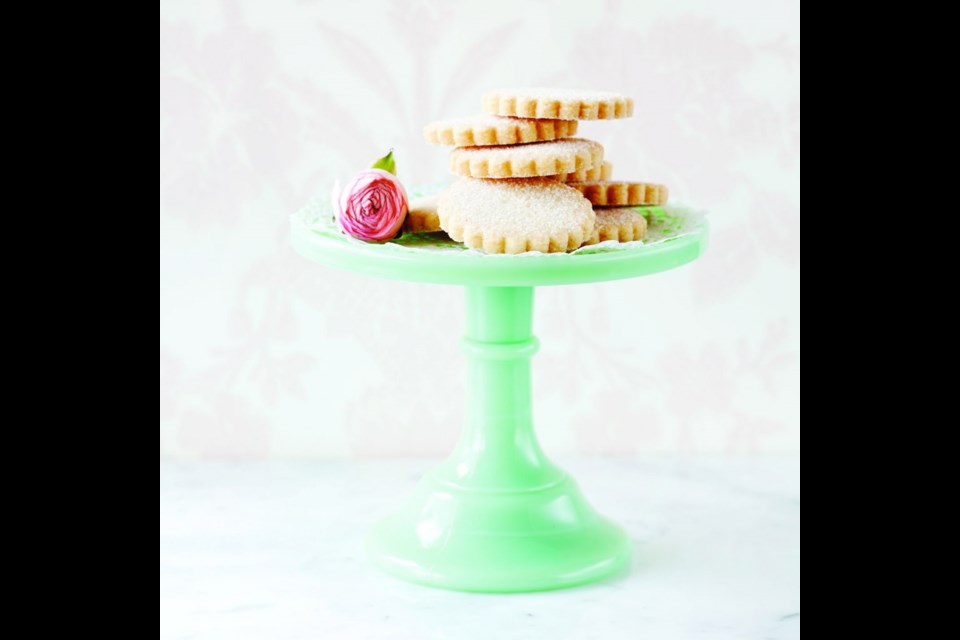
Vanilla Shortbread
This recipe is from Butter Baked Goods: Nostalgic Recipes from a Little Neighborhood Bakery (Appetite by Random House, $35). Author Rosie Daykin says she used to believe that shortbread was only for the Christmas season. “My customers convinced me otherwise, and they were right. We sell these cookies in bags of six at Butter, because one would never be enough.”
Makes: about 24 cookies
1 cup butter, room temperature
1 cup icing sugar
2 1/4 cups all-purpose flour
2 Tbsp pure vanilla
1/2 cup granulated sugar, for dusting
You will need:
- 2 cookie sheets lined with parchment paper,
- 2 1/2-inch circular cutter with scalloped edge
Preheat the oven to 325°F. In a stand mixer fitted with a paddle attachment, cream the butter and icing sugar on medium to high speed until light and fluffy. Scrape down the sides of the bowl.
Turn the mixer to low and add the flour and mix until just combined. Scrape down the sides of the bowl. Add the vanilla and mix to combine.
Place the dough on a lightly floured work surface. Use a rolling pin to roll out the dough to about 1/4-inch thick. Use the circular cutter to cut out 24 circles. Carefully transfer to the prepared cookie sheets and place about 1/2 inch apart.
Bake in the preheated oven for 15 minutes or until the cookies are lightly golden brown around the edges. Remove from the oven and sprinkle the cookies generously with granulated sugar while still warm. Transfer to wire racks to cool.
Options: Daykin says adding the zest of one lemon and one tablespoon of Earl Grey tea leaves to this recipe makes a lovely variation. Add them after creaming the butter and sugar, but before you add the flour.


