Dear Helen: I’m very fond of snapdragons and would love to grow the flowers, but I’m restricted to container gardening. Most of the plants I see are tall cut flower types. Are there any dwarf varieties suited for growing in pots?
A.L.
Several seed catalogues list dwarf snapdragon varieties. I have most often used Stokes Seeds as a source. They have three separate series of dwarfs for a total of 30 separate listings.
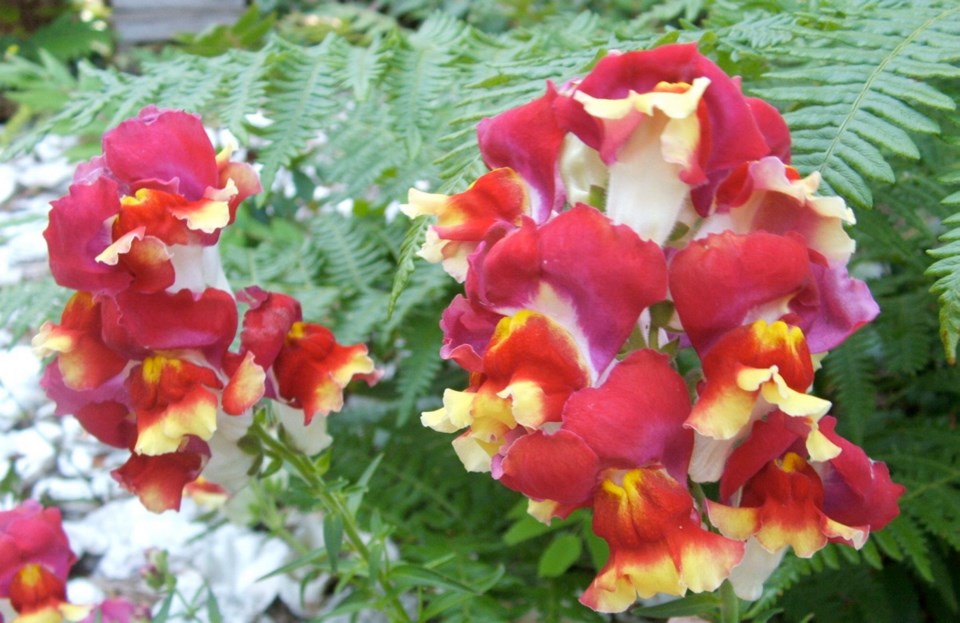
Plants in the Floral Showers series grow just 13 cm tall. Five of the 14 Floral Showers listings are for bicoloured flowers, which I particularly like. Among them is a striking red and yellow bicolour.
The 10 Snaptini varieties grow 15 to 20 cm tall. I liked the burgundy bicolour in this series. The six varieties in the Candy Tops series grow to 20 cm.
Stokes even lists a dwarf trailing snapdragon for mixed containers and hanging baskets. It’s called Candy Showers.
If you prefer growing from transplants, I’d phone a few of your local garden centres to find one or two that have ordered flats of dwarf snapdragon for spring sales.
The plants are not difficult to grow from seed. I’ve often grown dwarf snapdragons for a series of shallow, bowl-shaped planters placed on a raised rock platform alongside the back lawn. And over the years I’ve grown taller types for garden beds. I’ve always found the plants easy-growing and hardy. Occasionally some of the dwarf plants in containers even managed to self-sow onto the rock platform, where more little flowering plants flourished.
Because snapdragons are among the first flowers that can be safely transplanted outdoors, early in the spring, I aim at starting the seeds indoors in late January or in February. The seeds are pressed onto damp seeding mix, or very lightly covered with a scattering of the mix. Cover with clear plastic. Light aids germination.
As with most seeds, keep the flats or pots in warm room temperatures during the germination period of around a week. With germination, move the containers into bright light, short of direct sun, and cooler temperatures for strong, stocky transplants. Water only modestly. Over-watering creates week seedlings.
Dear Helen: In researching directions for starting seeds indoors, I have found instructions to seed into shallow flats or containers using a sterile, soilless mix. Then, when the seedlings are large enough to handle easily, transplant them into deeper flats using a planting mix for growing to outdoor transplanting size. Is that what you do?
S.E.
You have described the traditional two-step indoor seeding method that I learned at an agricultural research station when I was beginning to delve into serious gardening. In this method the seeding medium usually contains varying combinations of peat, vermiculite, and/or perlite.
I did not stay with that time-consuming method for long, though it remains the industry standard because commercial growers need to produce a saleable plant from every viable seed.
That need does not apply to most home gardeners. We don’t usually want or require dozens of the same plant. I soon moved on to a streamlined, one-step seeding method that produces a flower, vegetable or herb from seed to transplant size in the same flat.
In this method, the flat should have a minimum depth of six cm. Most of my seeding flats, two-litre milk and juice cartons with one side removed, are nine cm deep. For large plants like squash and cucumber I use four-cm wide pots set on plant trays.
For a mix that will sustain growth to transplant size I use an all-purpose commercial mix such as Pro-Mix BX mixed with about a third as much bagged, sterilized, all-purpose soil such as Island’s Finest Premium Sterilized Potting Soil. I usually add small amounts of vermiculite for moisture retention and perlite for porosity.
Seed as thinly as possible to reduce the need for thinning seedlings later, to allow transplants room to develop nicely.


