Wall trims and panels have decorated rooms for centuries. They add dimension and interest to plain walls and highlight the architectural style of the home.
Chair rails and picture rails serve a purpose as their names suggest. They are traditional trims seen in the living and dining rooms of older homes and country rooms. Because they divide the wall into upper and lower sections, this affords a perfect opportunity to choose mix and match decorating applications for each section.
Wooden wainscoting often runs along the lower walls, topped by a chair rail. This area gets the most wear and tear from furniture bumps and the wood and rail are good protectors. Stained wood or a dark coat of paint add weight to the base as well as practicality.
Nature-themed wallpaper and light paint finishes adorn the upper walls. Here you find airier treatments with shades and designs that keep the eye moving upward. If a picture rail is used, the décor above the rail can be a continuation of the ceiling colour, which will bring high walls into more human scale.
If you would like to experiment with wall trim in your own home, and are a DIYer, do it in steps. Designer Emily Henderson has styled a kitchen wall that can be done in stages. Start with the chair rail and the lower trim design, including the baseboard. Exact measuring and careful cutting are a must, so take your time. A helpful hint: Draw out the pattern on the wall with a pencil or chalk line. The upper wall has the same design with elongated rectangles. You can attach the trim with glue and/or nails. Fill in any gaps and nail holes before you paint. One colour unifies the wall and its details.
What about trim in more contemporary spaces? A little design adjustment and you are ready to go.
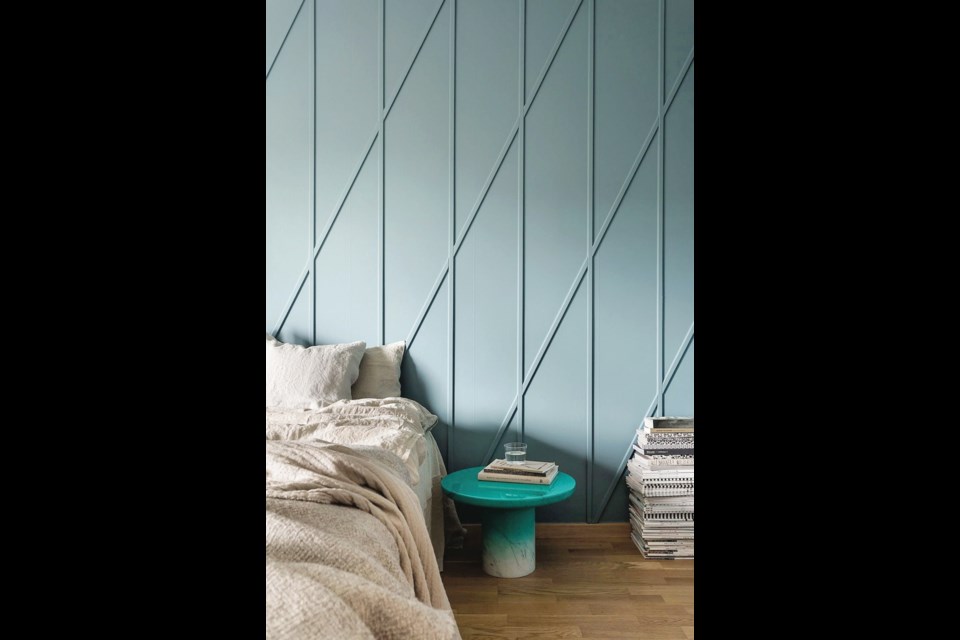
Geometry and fun come into play when interior architect Daniel Heckscher from Note Design Studio dreams up a project. By combining diagonal and vertical moulding strips those paneled walls take on a whole new character.
Line up and attach the vertical trim pieces first and then place the diagonals. Start your project by drawing out your wall to scale on a piece of graph paper. Devise a geometric pattern adjusting the spacing of the trim pieces. There is no right or wrong here, but repeating both equal and asymmetric shapes provides a balanced aspect to the finished picture. Your drawing will tell you if it looks and feels right.
To highlight your wall trim design even more, the strips can be painted in a contrasting colour. White trim against a black (or dark) background presents a strong modern image. For a youthful effect, mix primary colours as you build your shapes.
If you choose trim colours that are not the same as the background wall colour, paint the trim pieces first, then apply them to the wall. Any nail holes or nicks can be touched up after you have completed the pattern. Refer to your drawing when mapping out the wall design and use coloured chalk to mark in the colours on the wall.
Written by Debbie Travis and Barbara Dingle. Please email decorating questions to house2home@debbietravis.com. Follow Debbie at instagram.com/debbie_travis, facebook.com/thedebbietravis, debbietravis.com.


